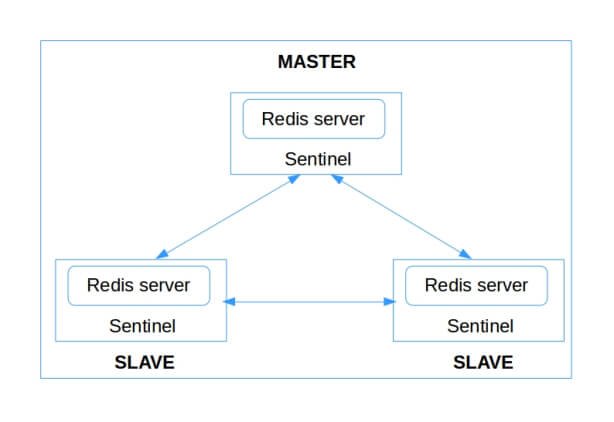
Redis là một trong những hệ thống lưu trữ key-value phổ biến nhất, nhưng để đảm bảo tính sẵn sàng cao (High Availability), việc triển khai Redis theo mô hình Sentinel là điều cần thiết. Tuy nhiên, việc cấu hình từng node một có thể mất thời gian và dễ sai sót. Vậy làm sao để triển khai Redis Sentinel nhanh gọn, đúng chuẩn?

Bài viết này sẽ hướng dẫn bạn cài đặt một cụm Redis chỉ bằng 1 file script duy nhất.
Script triển khai Redis Sentinel
#!/bin/bash
#Script for Install and configure Redis cluster + Sentinel
#KeepWalking86

#Initial
MASTER_IP=192.168.1.111
SLAVE1_IP=192.168.1.112
SLAVE2_IP=192.168.1.113
REDIS_PORT=6379
SENTINEL_PORT=26389

echo "Welcome to install and configure Redis cluster + Sentinel"
sleep 3

#check for root user
if [ "$(id -u)" -ne 0 ] ; then
        echo "Please, run this script as root account!"
        exit 1
fi

#Check OS and install essential package to compile redis
if [ -f /etc/debian_version ] ; then
    apt-get -y install build-essential
else
    if [ -f /etc/redhat-release ] ; then
        yum -y groupinstall "Development Tools"
    else
        echo "Distro hasn't been supported by this script"
            exit 1
    fi
fi

#Installing redis
cd /opt
curl -O http://download.redis.io/redis-stable.tar.gz
tar xzvf redis-stable.tar.gz
cd redis-stable
make
cp /opt/redis-stable/src/redis-cli /usr/bin/
cp /opt/redis-stable/src/redis-server /usr/bin/

#Configure redis
mkdir /etc/redis/
mkdir /var/log/redis/
cp /opt/redis-stable/redis.conf /etc/redis/
sed -i 's/supervised no/supervised systemd/' /etc/redis/redis.conf
sed -i 's/dir .\//dir \/var\/lib\/redis/' /etc/redis/redis.conf
sed -i '/bind 127.0.0.1/c\bind 0.0.0.0' /etc/redis/redis.conf
sed -i '/logfile/c\logfile "/var/log/redis/redis.log"' /etc/redis/redis.conf

#Set up the systemd unit file
cat >/etc/systemd/system/redis.service<>/etc/redis/redis.conf
    systemctl restart redis.service
fi

#Configure redis sentinel
cat >/etc/redis/sentinel.conf</etc/systemd/system/redis-sentinel.service<<EOF
[Unit]
Description=Redis Sentinel
After=network.target
[Service]
ExecStart=/usr/bin/redis-server /etc/redis/sentinel.conf --sentinel --daemonize no
Restart=always
[Install]
WantedBy=multi-user.target
EOF
systemctl start redis-sentinel.service
systemctl enable redis-sentinel.service
Cấu hình haproxy.cfg
# Global settings
global
        pidfile     /var/run/haproxy.pid
        maxconn 10000
        user haproxy
        group haproxy
        daemon
        quite
        stats socket /var/lib/haproxy/stats
        log 127.0.0.1   local0
## Statistics settings
listen statistics
        bind *:1986
        stats enable
        stats hide-version
        stats realm Haproxy\ Statistics
        stats uri /stats
        stats refresh 30s
        stats auth keepwalking86:ILoveVietnam$
## Redis HA
listen redis
        bind *:6380
        mode tcp
        timeout connect  6s
        timeout server  12s
        timeout client  12s
        option tcp-check
        tcp-check send PING\r\n
        tcp-check expect string +PONG
        tcp-check send info\ replication\r\n
        tcp-check expect string role:master
        tcp-check send QUIT\r\n
        tcp-check expect string +OK
        server redis1 192.168.1.111:6379 check inter 1s
        server redis2 192.168.1.112:6379 check inter 1s
        server redis3 192.168.1.113:6379 check inter 1s
Kết luận
Chỉ với một file script đơn giản, bạn đã có thể triển khai Redis Sentinel để đảm bảo High Availability cho Redis.


